Showing posts with label homemade. Show all posts

Thursday, January 18, 2018

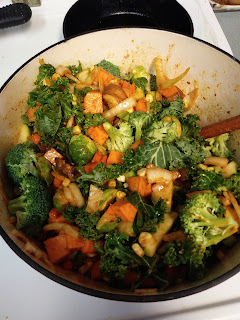
Snow/Iced-In: The Curry Edition

We're a little more than half way through January, and we've already had two snow or ice "events" that have slowed down life as we know it. This week, the forecast of snow was for Tuesday night into Wednesday. Wednesday is my gallery day, and when I can, I like to cook in our studio kitchen for myself and my studio mates (with hopefully enough for anyone else who might be around). So I had already planned on a curry, and in fact a version of this very curry, which I had developed last fall when I was cooking for all the lovely people at Sandbridge. 

Curry first day, with Rosetta's Peanut Butter Tofu
I had been making a curry for "Thai Tuesday" for the past couple of years, and they were good, but I was continually tweaking. I ran across a recipe for a red curry in the New York Times (I'd link it, but I can't remember which one it was), and that became the inspiration for this version. If you've followed any of the recipes I share here, you know that I occasionally like to follow a recipe as written, but usually use it as a guide. So images of what I actually made this week that I'm posting here may not match up exactly to the recipe as written. Perhaps I should start always adding one more ingredient: Variation. I'd say follow the recipe for the seasoning aspects, but then use what you have/love for the vegetables. And add protein, if you want. You'll see I did a couple of versions myself.

Veg Prep: I'm kind of a nerd with 'mis-en-place',
and hey, I have the bowls!
Now back to our story - I was planning to prep all my veg and have some mixed together and ready to transport to the studio to make the gallery smell all kinds of good. And then the weather that was forecast actually happened! I was home, snugly iced into my little neighborhood with a kitchen full of yummy ingredients waiting to become a seriously sexy curry.
Whenever someone questions why I have some
random thing in the pantry, I answer 'for times like this!'
Variation is often motivated by taste, but sometimes it's also a way to adapt to the unforeseen. In this case, I found out only after the weather started that I was out of curry paste. Happily, I have a habit of stocking up on interesting things at Hopey & Co., in case I find myself in a situation where I can try something new, or use parts in other recipes. I had tried Marion's Kitchen Thai Red Curry Kit before, and it's really very tasty. More important, it contains a pouch of delicious red curry paste, a pouch of dried basil and chiles, and even bamboo shoots (along with coconut milk, which I had plenty of, so I used the pouch to make my morning porridge bowl). So if you're in a rush, grab one of these - adapt it, too, if you like, and you'll have a quicker curry (although my favorite 'quick curry' is still to plotz a tub of Roots Thai Coconut Curry Hummus into my curry broth and blend it with an immersion blender). 

The recipe is a guideline - use what you have on hand.
Ok, seriously back to the recipe now - for the snow/ice day version, I used veg I had on hand, using up the last of a few things, so there are more and different components in what I made than what the recipe says. That's variation - the sauces and the process are the same.

The key to this recipe is to prepare the various parts in advance, and then put them together as ordered. This will give you much better flavors than dumping it all into one pot. It may seem tedious, if you're used to more streamlined recipes, but if you have the time, it's totally worth it. Cut up all your veg, prep your sauces, then it's just assembly and simmering!

I had my first bowl of warming, spicy curry with some Rosetta's Peanut Butter Tofu that I roasted up from my freezer stash. My intention was to take the leftovers to the studio, and for that I roasted up some chicken thighs (marinated 1 hour in olive oil, lime juice, salt, and pepper - roast at 375), but the cold stayed, which means the ice stayed, which means most everyone stayed home. So tonight I'm having the roasted chicken version, and tomorrow I'll take the rest to the studio - having an extra day to meld flavors, and spice (I left the chiles in the soup!) will make this even better on day three!

So here, after all that, is the recipe*!

*This recipe was first printed in the Sandbridge Calendar.

Vegetable Panang Curry

1 can coconut creme (this is simply creamed coconut - no added anything!
1 can coconut milk
1/2 cup vegetable stock or broth
4 tsp. tamari sauce
4 tsp. maple sugar (or brown)
6 TBSP. red curry paste (use your favorite, but if you're making it vegan, use a paste that doesn't have fish sauce - Maesri Panang Curry Paste is very good!)
1/2 cup diced onion
2/3 cup thinly sliced fennel bulb
2/3 cup sliced zucchini (cut in half length wise first)
2/3 cup diced sweet potato
1 can bamboo shoots, drained
1 can baby corn (or kernels from one cob of corn)
1 cup green beans, trimmed and cut in half
1 lime
8 large basil leaves, thinly sliced (chiffonade)

Utensils:
1 large soup/stock pot
1 large bowl
2 small-medium bowls (2 cup capacity)

Open the can of coconut creme - there will be a really thick layer on top (you can refrigerate the day before if you want to be sure of separation). Spoon that layer out into the stock pot. Pour the rest into one of the smaller bowls. To that, add the can of coconut milk, stirring well to combine.

Broth/Tamari mix on the left, Coconut Milk on the right
In the other small bowl, combine the stock/broth, tamari sauce, and sugar. Stir or whisk until the sugar is dissolved or mixed thoroughly.

As you prep the vegetables, place them in the large bowl - all together.

Stir the curry paste into simmering coconut creme
(this is a still of a video I posted in an Instagram Story).
Meanwhile, back at the stock pot: heat the pot over medium-high heat until the coconut creme bubbles. Add the curry paste (you thought I forgot, didn't you?!), stir to combine and lower the heat to medium-low. Stir constantly for about three minutes.

Curry-Coated Vegetables, ready for the coconut milk.
Dump in all the vegetables and stir to coat them all in the curry paste. Cover and cook for about 2-3 minutes, or until they're all heated throughout. Add in the coconut milk, and bring it all to a boil. Then reduce the heat to a simmer, and cook uncovered until the veggies are tender (but not squishy soft, unless that's how you like them) - about 10 minutes. Add the tamari mix, a generous squeeze of lime, and half the basil. Stir to combine, and add water if you think it's still too thick. Bring it all back to a simmer for another five minutes. Sprinkle the remaining basil on the top if serving family style, or on individual portions.

Leftovers, with more developed flavors, deeper spice.
This time served over bean thread noodles.
You can serve this as is, as a soup, or over rice or rice noodles, zoodles, or spaghetti squash. You can also add protein, like roasted chicken, baked tofu, or any other leftover or separately cooked proteins. Add them when you add the tamari, and heat throughout. This has a nice, warming spice to it, but if you're serving serious spice-heads, you might want some additional chile sauce or oil on the side. 

Tuesday, July 26, 2016

Mid Year Catch Up

Well I guess I shouldn't complain if I'm so gratefully busy in the studio that I can't keep up a timely post on the blog, but I still miss the meditative quality of meandering through a post, revisiting an experience or a recipe and having an open-ended conversation about ... whatever. I'm much better at the 'immediate' chronicling that is available on Instagram and Facebook, but writing in the blog is kind of like writing a letter, long-hand. It connects me to the subject in a way that the passing shot and comment only touch upon.

Alas, major phone updates have squelched the time I set aside to do a nice, chatty blog this morning, but I am determined to cross at least one thing off the 'home-work' list, so here's a little combo of things that have been insta-posted with some notes, and maybe even a recipe or two. Kind of my "year to date in pictures":


homemade tastes better, handmade, pottery, food porn

I started the year off with color, and the bounty of my local farmers in western North Carolina has helped me keep a very colorful menu. Breakfast salad is one of my favorite meals, morning, noon, or night! Mixed greens, roasted veggies, an egg - hard, soft, or over easy, maybe some pickled veg. Endless options!!


Testing new forms for a restaurant client led to this lovely bowl, now a permanent add to my inventory rotation. It holds another favorite - oven roasted vegetables. Get your veg cut for even cooking (based on how fast they roast), then lightly massage them with coconut oil. Sprinkle with salt, pepper, smoked paprika, turmeric, and any other spice/flavor you like. Roast at 400 degrees until tender to your tastes.


More testing of forms for restaurant ware, and of course they must be tested! Because I don't make 'flame-ware', my ceramics must be heated with the oven, so the baker isn't for restaurants (but for home use, it works wonderfully!), but the square plates are one of the forms I'm playing with, and this one has become a favorite in the studio kitchen (as was the quiche!).


My friend Kay sent me a counter-top Spiralizer, and I have been having a LOT of fun with it. The colors of the season continue, and it was delicious and looked great on a test plate for the restaurant ware, too!


homemade tastes better, handmade, crazy green studios, tandem restaurantPots in Action! I am so grateful to have met and to be working with Chef Younes and his wonderful partner, Emma, and to have designed work for their fabulous restaurant, Tandem, in Carrboro, NC. I was able to taste their delicious creations on my own creations, as well, when I made a delivery this spring. I'm looking forward to making more and new forms for them this year!


 We have been feeling the heat of summer, here, and since I found my popsicle molds, I've been having fun coming up with refreshing treats. These "Raita Pops" were a blend of bananas and yogurt, with a dash of maple syrup for the pop base, with cherries and blueberries dropped into the molds to make a patriotic pop for July 4. In the freezer now: watermelon, blended with a ginger lemonade.


More July 4 celebrating, this time it's the annual "Waffle-palooza" to celebrate a studio mate's July 4 birthday. I don't have it at my fingers, but I will share my version of this really good, gluten-free waffle. I tested it out to make on the side, for the GF members of our studio, but it was so good, I decided it should just be 'the waffle', and it was scrumptious!


A new trend swept across social media: Sweet Potato Toast! It calls for cooking slices of sweet potato in a toaster. I tried it, and it works great, although it's kind of a time-suck to keep re-toasting, and depending on how evenly your toaster toasts (mine, not so much), flipping the pieces for more toasting. Enter my faithful Foreman Grill, and I have the same great results, with grill marks, even! Just slice evenly - don't put anything on it, just grill/toast it. I've used it as a crostini, a burger bun, and in this lovely shot, the base for an eggs benedict with a lovely cashew hollandaise (I may have posted that recipe already, gotta check). LOVE the sweet potato!


I love it when clients share pictures of my pots in action! I loved making this 'tree' dinnerware set with service pieces for this lovely couple, and now I want to be invited to dinner - looks yummy!!


 And my most recent fun with food and forms continues the color-fest! A smaller, test version of the restaurant ware is perfect for a couple of colorful tacos. Tacos and/or nachos have become my favorite way to deal with smaller amounts of ingredients or left-overs. These lovelies were seasoned flounder with leftover sweet potatoes, tomatillo salsa, avocado and a quick slaw of red cabbage and carrots marinated in lime, lemon, and ginger, with a bit of salt. The leftover juice from the watermelon/ginger lemonade blend for popsicles made a great margarita base, too!


Mid Year Catch Up

Well I guess I shouldn't complain if I'm so gratefully busy in the studio that I can't keep up a timely post on the blog, but I still miss the meditative quality of meandering through a post, revisiting an experience or a recipe and having an open-ended conversation about ... whatever. I'm much better at the 'immediate' chronicling that is available on Instagram and Facebook, but writing in the blog is kind of like writing a letter, long-hand. It connects me to the subject in a way that the passing shot and comment only touch upon.

Alas, major phone updates have squelched the time I set aside to do a nice, chatty blog this morning, but I am determined to cross at least one thing off the 'home-work' list, so here's a little combo of things that have been insta-posted with some notes, and maybe even a recipe or two. Kind of my "year to date in pictures":


homemade tastes better, handmade, pottery, food porn

I started the year off with color, and the bounty of my local farmers in western North Carolina have helped me keep a very colorful menu. Breakfast salad is one of my favorite meals, morning, noon, or night! Mixed greens, roasted veggies, an egg - hard, soft, or over easy, maybe some pickled veg. Endless options!!


Testing new forms for a restaurant client led to this lovely bowl, now a permanent add to my inventory rotation. It holds another favorite - oven roasted vegetables. Get your veg cut for even cooking (based on how fast they roast), then lightly massage them with coconut oil. Sprinkle with salt, pepper, smoked paprika, turmeric, and any other spice/flavor you like. Roast at 400 degrees until tender to your tastes.


More testing of forms for restaurant ware, and of course they must be tested! Because I don't make 'flame-ware', my ceramics must be heated with the oven, so the baker isn't for restaurants (but for home use, it works wonderfully!), but the square plates are one of the forms I'm playing with, and this one has become a favorite in the studio kitchen (as was the quiche!).


My friend Kay sent me a counter-top Spiralizer, and I have been having a LOT of fun with it. The colors of the season continue, and it was delicious and looked great on a test plate for the restaurant ware, too!


homemade tastes better, handmade, crazy green studios, tandem restaurantPots in Action! I am so grateful to have met and to be working with Chef Younes and his wonderful partner, Emma, and to have designed work for their fabulous restaurant, Tandem, in Carrboro, NC. I was able to taste their delicious creations on my own creations, as well, when I made a delivery this spring. I'm looking forward to making more and new forms for them this year!


 We have been feeling the heat of summer, here, and since I found my popsicle molds, I've been having fun coming up with refreshing treats. These "Raita Pops" were a blend of bananas and yogurt, with a dash of maple syrup for the pop base, with cherries and blueberries dropped into the molds to make a patriotic pop for July 4. In the freezer now: watermelon, blended with a ginger lemonade.


More July 4 celebrating, this time it's the annual "Waffle-palooza" to celebrate a studio mate's July 4 birthday. I don't have it at my fingers, but I will share my version of this really good, gluten-free waffle. I tested it out to make on the side, for the GF members of our studio, but it was so good, I decided it should just be 'the waffle', and it was scrumptious!


A new trend swept across social media: Sweet Potato Toast! It calls for cooking slices of sweet potato in a toaster. I tried it, and it works great, although it's kind of a time-suck to keep re-toasting, and depending on how evenly your toaster toasts (mine, not so much), flipping the pieces for more toasting. Enter my faithful Foreman Grill, and I have the same great results, with grill marks, even! Just slice evenly - don't put anything on it, just grill/toast it. I've used it as a crostini, a burger bun, and in this lovely shot, the base for a eggs benedict with a lovely cashew hollandaise (I may have posted that recipe already, gotta check). LOVE the sweet potato!


I love it when clients share pictures of my pots in action! I loved making this 'tree' dinnerware set with service pieces for this lovely couple, and now I want to be invited to dinner - looks yummy!!


 And my most recent fun with food and forms continues the color-fest! A smaller, test version of the restaurant ware is perfect for a couple of colorful tacos. Tacos and/or nachos have become my favorite way to deal with smaller amounts of ingredients or left-overs. These lovelies were seasoned flounder with leftover sweet potatoes, tomatillo salsa, avocado and a quick slaw of red cabbage and carrots marinated in lime, lemon and ginger, with a bit of salt. The leftover juice from the watermelon/ginger lemonade blend for popsicles made a great margarita base, too!


Saturday, February 21, 2015

MacGyver Lunch

Due to a combination of the busy-ness of getting back to work after the holidays, weather delays, and various rounds of 'the crud', we haven't really done much cooking in studio yet this year. So when a spontaneous desire for a studio lunch was being hatched yesterday, I knew we'd need most of what we wanted to eat. My lovely studio mates equipped me with a requested menu, a list and a credit card, and left the rest up to me - which is one of my favorite ways to shop! I didn't want to have to go to several shops, so I was determined to get everything from the closest grocery. The requested menu: burgers, sweet potato fries, and pie. To make the adventure more interesting, the closest grocery is Hopey & Co., which is "an artisan and discount food and beverage shop", which means you can always find really cool ingredients, but not necessarily all the time.

Organic beef - check. Whole wheat buns, avocado, sweet onion, bacon, and cheese - check. Sweet potatoes and requested beverages - check. Pie ... almost anytime I'm NOT looking for pie, there is pie in the freezer section. Today, no pie. But they did have whole wheat pie shells and bags of sliced, frozen peaches. Pie! Grabbed those, along with some candied ginger and back to the studio.

Maybe in another post, I'll go into detail about not having any oils at the studio, and how I used a combination of margarine, oil from a tub of olives, and bacon grease for the lunch prep. As it was, we were all so hungry, I didn't get any pictures of that, so we'll go on to the pie.

While things were in the oven, I started to put together the pie so I could let it bake while we ate lunch. I sliced up the ginger pieces, tossed them with the peaches and a little sugar, and then (and only then) did I realize I might need something to soak up the excess juices bound to come out of the peaches. No cornstarch. No arrowroot. No agar. What's this in the freezer - ground flax seed? I'd used that as an egg substitute and to thicken up soups before, so a little should help, plus it's good for us. What's this in the back of the cupboard - instant oatmeal? Perfect! Tossed that in as well, mounded the fruit in the shell, and inverted the extra shell on top. A little egg wash and a sprinkle of sugar, and a whole lotta 'please oh please don't be a runny mess when you come out!"


Because I had to dash off to a meeting and because I couldn't stand to wait, we cut the pie while it was still pretty warm, so there were juices, but I could tell that given a proper cooling-off time, the pie would have held up fine:


And to my great delight and astonishment, when I came in to open the Gallery this morning, I found leftover pie!! Breakfast of champions, and a nice little slice confirmed that the pie was in fact a pie. And it was good. 


And is it odd that I rather enjoy this sort of renegade kitchen fare? Not every time, but once in a while, it's rather invigorating!

Sunday, July 27, 2014

Oven Roasted Trout

Fresh ingredients need very little added for full flavor enjoyment. That's pretty much it. I haven't had as much time yet this season to peruse through the Farmer's Markets and play in the kitchen or at the grill - but I'll be rewarded at the end of the summer in a big way ... that I'll say more about ... later.

For now, I take my opportunities where I can. I got some leeks from one of my favorite local farmers this week, and last night on my way home I picked up a beautiful, cleaned local trout, some lemon and a bag of brussel sprouts. Tonight, I did very little other than snip some thyme from the garden and lightly season along the way, and I had a lovely result.


Preheat oven to 395 degrees (f).
Cut 1 lemon in half, and cut one half into thin wedges, 
and slice the other half into half rounds.
Trim and clean 2 leeks, and slice in 1/4" half rounds.
Cut two pieces of parchment paper to fit inside an oven-proof baking dish, and place one in the baking dish and the other on a cutting board. Place the half round lemon slices atop the 'cutting board' parchment. Sprinkle all but a handful of the leeks on top, and top that with a few sprigs of fresh thyme.


Rub the outside of the trout with a little olive oil and sprinkle of salt. Open fillet and lightly salt. Place all but three of the lemon wedges inside, along with the handful of sliced leeks and a few sprigs of thyme.


Close the trout, and score the top in three places. Put a wedge of lemon and a sprig of thyme in each score. Place trout on the parchment atop the lemons, leeks, and thyme.


Place the trout on parchment inside the baking dish, on top of the other parchment. 
Cut 1 1/2 cups of brussel sprouts in half (in quarters if larger), toss lightly with oil and salt, and place them on the bottom parchment, but under the top parchment. (If you're wondering why, it's to let the sprouts retain their own flavor.)

Bake for 25 minutes, then let rest out of the oven for a few minutes. Remove the sprouts, lightly drizzle with aged balsamic, and salt to taste.


Serves 1-2 (if you're sharing or just really hungry). 

Friday, June 6, 2014

More Strawberry Love

Breakfast on the Go:

A quickie, but an old favorite. Still looking for ways to enjoy this season's delicious strawberries, and not always having a lot of time. I love them just the way they are, but sometimes a little more substance is needed for the start of the day. And some people think oatmeal is just for the cooler months, and I agree that I don't eat a lot of hot oatmeal in the summer, but that doesn't mean you need to neglect it for the entire season!

I took a small jar and started with about 1/3 cup of oats, topped with a handful of sliced strawberries and a small peach. Grated a small bit of fresh ginger, drizzled some honey, then topped with about 1/2 cup of goat milk yogurt and a couple of leaves each of fresh basil and mint, torn into small pieces. 


the ingredients

I gave the jar a good shake, then tossed it in my bag and headed to the studio. By the time I got to the studio, the oats had begun to soften and the flavors of the fresh fruit were nicely mingled with the ginger, honey, and herbs. 


brekkie in a jar
I'm looking forward to more combinations throughout the season. And I realize I don't have a lovely image of my morning porridge in a beautiful handmade bowl, but I was just hungry enough when I got to the studio that I ate this out of the jar. If I were to (and when I do) 'plate' this, I think a yunomi tea bowl will be the vessel. Stay tuned.

Wednesday, June 4, 2014

Strawberries!


I love going through Spring as fruits and veg start crowding each other at Farmer's Market stalls, and the strawberries have been so luscious this year that it's been hard to resist! 

Recently, having picked up berries at the weekend Tailgate, I had the chance to get some more from another favorite farm, Mudluscious Gardens. I didn't want any to go bad, and there's only so much room in the freezer. No time for jams or preserves, so what else? 

Cue the serendipity please: a random re-organization of a kitchen drawer led to the re-discovery of a popsicle mold, and even better, some sticks! Combine that with a forecast for rising temps, a few other key ingredients:


...and we have a plan. Goat milk yogurt, berries, honey, balsamic vinegar, and a bit of basil. I was throwing this together before work, so I didn't measure exactly (big surprise!), but I found this recipe at ACoupleCooks.com that more or less shared my ingredient list - I used goat milk yogurt and I think a bit less honey. Also, I just tossed everything in the food processer and let it rip until it was well blended - what they detail below would be excellent as well to pull even more flavors out:

Strawberry Basil Popsicles
by: 
Makes: 8 to 9 popsicles
What You Need
  • 1 pound / pint (2 cups) strawberries
  • 1 teaspoon balsamic vinegar
  • ⅓ cup honey
  • 1 cup Greek yogurt
  • 10 basil leaves
 Technical note: if you have this type of popsicle mold, make sure your sticks are standing STRAIGHT up, to avoid a rather comical event when it's time to take off the lid. :)
What To Do
  1. Hull and roughly chop strawberries. In a bowl, combine the strawberries with ⅓ cup honey and 1 teaspoon balsamic vinegar, and let stand for 15 minutes.
  2. Blend together the strawberries with 1 cup Greek yogurt and 10 basil leaves using a blender or immersion blender, until thoroughly combined.
  3. Pour the mixture into popsicle molds and freeze until firm, about 4 hours.
Notes
Adapted from The Kitchn

My review: refreshing but not too sweet - big win and can't wait to try other versions!

Monday, June 2, 2014

Spring Market Inspirations

Good News! Studio life is ramping up (mmmmm...ramps!), and the rest of the year looks productively busy and fruitful (mmmm....fruit!). And although I may not be home to cook as much, even the studio kitchen is getting more beefed up (mmmm...ok, I'll stop) with the addition of an oven/stove. Watch for studio creations in the future. And I did manage to get a bit of garden planted, with great hopes to continue - also another post to come.

Tonight's fun in the kitchen was motivated by running across a sale on lamb chops at the Farmer's Market, followed by a lucky grabbing of the last bunch of pencil-thin asparagus at another booth. 

As the chops were marinating in a bit of garlic, rosemary, thyme, salt, and olive oil, I looked through what else was on hand, and this is what happened (recipe is in there if you pay attention!):


The sweet potatoes were cut up and boiled for a mash, and while they simmered and the meat marinated, the garlic scapes and shallots were chopped (small dice) and saute-ed in olive oil, seasoned with salt, pepper, and fresh thyme. Sliced mushrooms were added to that, and after it cooked down a bit over medium heat, a small drizzle of aged balsamic vinegar and about 3 tbsp of stock were added before I placed the asparagus on top. Covered that and let it steam on med-lo heat while I seared off the chops in a hot cast iron pan in a bit of olive oil over med-hi heat. After they were browned on both sides (3 minutes or so each side), they went into a preheated 400 degree oven for 10 minutes, during which, the sweet potatoes were mashed with 2 tbsp butter, a splash of almond milk, a few grates of pecorino romano, and salt/pepper to taste. The chops were taken out of the oven and moved to a platter to rest for a bit while asparagus was plated and topped with mushrooms/scapes along with the mash, and then we had dinner!


Sunday, March 17, 2013

Homemade Guest Series

Beginning in April, we will be featuring regular guest posts from Asheville-area chefs and avid cooks. They will be sharing a little of their story, along with a delicious 'homemade' recipe that will be prepared and/or plated up on/in some beautiful handmade pottery. 

Our guests will be using seasonal, local ingredients, so as we follow the series through Spring and Summer, you'll get a thorough taste of the local bounty.


homemade tastes better on handmade, homemade, handmade, pottery, guest chef, recipes

Here's another teaser of sorts - another look at one of the serving bowls in my hasty and poorly taken image in the last post. It looks a bit better now, but just wait until you see what one of our guest bloggers puts inside - stay tuned!!

homemade tastes better on handmade, homemade, handmade, pottery, guest chef, recipes

Thursday, March 14, 2013

Spring Teaser...


A quick snap of some of the new test pieces out of the last kiln. A bad photo that hopefully speaks to my excitement about soon putting good, homemade foods in each. What would you put in them? Stay tuned, and soon you'll see all sorts of inspired dishes from very talented chefs and cooks. Guest Chef Series begins in April!

Friday, February 15, 2013

More Sweet Potato Love

We had a bit of a party at the studio this week. We were so happy to welcome good friends and avid collectors Rick & Mary to spend the day with us, watching multiple Raku firings and in general having a very nice visit with all of us in the studio.

The weather wasn't as lovely as it could be, so we devised a warming menu of lamb/chuck burgers, with all sorts of fixin's!

Mary wanted the recipe for the Sweet Potato Fries, so that's what we'll focus on today. The burgers were freshly ground lamb and chuck from The Chop Shop, so needed very little in the way of seasoning beyond a dash of salt, pepper, and soy sauce before hitting a hot grill (thank you again, George Foreman!). Maybe a light sprinkle of smoked sea salt once on the grill.


To begin prep on the sweet potatoes, they were all cut, then tossed in some unfiltered olive oil and an herbed sea salt with a dash of cayenne. Thinly sliced shallot and chopped garlic were tossed in as well.

Next, fry up a pound of bacon (to be used as a burger topping)*. We use an electric skillet at the studio, but you can cook the bacon on the Foreman grill as long as you have a method to collect the grease. Pour off the grease and clean out the pan. When you're ready to cook up the fries, pour in some bacon grease so you have about 1/4" standing. Get it nice and hot (but not smoking) and add the sweet potatoes. I've not listed quantities, as you'll make as much as you want. We used about 6 sweet potatoes, so the pan was full. Toss to make sure the bacon fat is evenly coating the fries, then cover and let cook 5 minutes or so. Open the pan and give them a stir - you'll get some nice browning and caramelization on the bottoms. Give a taste for doneness and season as needed, they'll likely need a few more minutes under the cover.

Remove them to a paper towel lined platter to soak back a bit of the grease before serving.


Our burger buffet, also featuring saute-ed mushrooms (crimini/shiitake blend with leeks), caramelized sweet onions, avocado, and goat cheese.

Mary, if you have any questions, let me know. And if you don't mind, perhaps I'll share the recipe you'll be sending me for those delicious Nutty Apple Muffins when I get it!

*If you're not frying up bacon, you can use oil for cooking the sweet potatoes. We won't judge.