Saturday, December 19, 2015

Plough to Pantry

I'll post proper links as soon as they're available, but I am so excited to share this I just couldn't wait. I am beyond grateful to be included in this fine publication, and more so in a feature about homemade and handmade (as you might expect). Many thanks to all involved - Plough to Pantry is available at various locations in Asheville, and you can also subscribe to a digital edition via their parent website.

Cover Photo by Megan Authement: A ploughman's lunch by Budy Finch Catering and Revelry of Flat Rock, NC, featuring Blue Ridge Mountain Creamery's Ugly Baby Swiss and Cana de Cabra goat's milk cheese from Spain, a puree of roasted local butternut squash, sweet potatoes, carrots and rutabagas with toasted pepitas, sourdough bread from Candler's Farm & Sparrow Bakery and Highland Brewing's Cold Mountain Winter Ale in Pottery by Lori Theriault of Crazy Green Studios and The Village Potters in Asheville's River Arts District, shot at Villagers urban homestead supply store in West Asheville.
Artist: Lori Theriault. Restaurant: Curate. Photo by Paul M. Howey

Above left: Restaurant: Glass Onion, Artist: Magnum Pottery. Above right: French Broad Chocolate Lounge,
Artist: Lori Theriault, Photos by Paul M. Howey. Bottom left: Artist: Lindsay Rogers Ceramics. Photo courtesy of the artist.

"Does the pot look better because of the food, or does the food look better because of the pot?"
Artist: Lindsay Rogers Ceramics. Photo courtesy of the artist.

Saturday, October 24, 2015

Cooking the Season: Stuffed Pumpkin

I love the colors of this season! Reds, oranges, yellows - they're beautiful in the trees and in the food. When I was still at Virginia Beach, I started seeing the glorious and beautiful bounty of the Fall season at my favorite little farm stand, and I brought some of it back with me in the form of beautiful orange, green and white pumpkins that contributed to this cozy dish. I needed something to add to a studio pot luck, and I really wanted to use one of the colorful pumpkins as a centerpiece to my dish. Here's what I did:

First I dry roasted some poblano peppers, carrots, fennel, parsnips, sweet potatoes and garlic with a generous sprinkle of turmeric and cumin. 

While they roasted, I saute-ed shallots with crimini and shiitake mushrooms, 


then added some corn I cut off the cob and torn pieces of kale (with a little salt and pepper). 


I put the lid on and let everything steam in the mushroom juices until everything was tender, and when the veggies were roasted tender, I tossed those in as well.

Then I realized I had some of Rosetta's Peanut Butter Tofu, and I roasted that up and added it to the veggies.


I picked the gorgeous white pumpkin for my cooking and serving vessel. I cut a lid, scooped out the seeds (they'll be cleaned and roasted later), and based on a suggestion I saw on another blog, I grated a bit of manchego cheese in the bottom of the pumpkin, to help keep it from seeping out the bottom when it cooked.

I filled the pumpkin with my roasted veggie mix, put on the lid and put it on a baking sheet in a 400 degree oven. I baked it until it was darkened and tender. The lid started to get a little over-browned, but I had an aluminum pie plate that covered it perfectly for the last 30-45 minutes of baking. All together, it was in the oven almost 3 hours.


Results - gorgeous, delicious, comforting tastes of Fall!


And what was left in the pumpkin after the dinner was mixed with some cooked quinoa to make a perfect filling for some roasted poblanos the next day! 

Friday, September 25, 2015

Sandbridge Tomato Stacks


I'm spending the waning summer weeks (I know it's officially Fall, but it still feels like summer here for the most part!) at Virginia Beach cooking for an eclectic group of very appreciative musicians, and I am fortunate to have a most excellent produce stand (Cromwells Produce) within reach to help me plan meals. I have a basic plan of "fish, veg, salad, bread, dessert" for each day, and the good folks at Cromwells make specifics easy by offering up a lovely array of seasonal goodies from the adjacent farm. Gorgeous green beans, tomatoes, squash, kale, sweet potatoes, onions, poblano peppers and more make appearances on the dinner menu. And I also make fun nibbles for "happy hour", and while pondering aloud what I should do to take advantage of the incredible tomatoes, Elizabeth at Cromwells gave me the idea for a Tomato Stack, which I translated to fit my group.


Prep for "baked not fried green tomatoes"
Each week, there's a different group of people, and within each week, there are folks who have various allergies, sensitivities and/or food preferences. I want happy eaters, so I do what I can to make dishes that everybody can enjoy. Sometimes there are a few alternate choices when a main dish can't be totally converted, but I was able to make versions of this app to suit everyone this week. I'm listing the recipe as I made it, with notes on possible substitutions. It was a huge hit, and will make appearances in various forms as long as the tomatoes hold out while I'm here! When I made this last night, a lot was "eye-balled" in quantities and proportions, and it was made to feed 26. What I have below is an attempt to bring it down to "serves 6", but in lieu of exact measurements, I may use proportions and/or suggestions. I'll refine once I make it with pen and paper in hand. :)


Sandbridge Tomato Stacks

Tomato Stack

(serves 6 ... ish)

Preheat oven to 425 F.

6 medium/large green tomatoes
6 medium small red tomatoes (I was able to use a gorgeous tiger-striped variety)
1 cup gluten-free bread crumbs (of course if you're not gluten free, you can use regular Panko)
Salt
Cayenne Pepper
Dried Basil leaves
Dried Parsley leaves
3 Duck eggs, or 4 regular eggs, lightly beaten
1/2 cup coconut milk (or 'milk' of your choice)
Soft Goat Cheese
Kalamata Olives, halved

In a wide rim bowl, whisk 'milk' into beaten eggs. In another small bowl, combine bread crumbs with salt, cayenne (both to taste) with a generous sprinkle of dried basil and parsley.

Slice green and red tomatoes into approximately 1/4" slices. Lightly coat a baking sheet with canola or coconut oil spray. 

One by one, dip each Green Tomato slice in egg mixture, then into bread crumb mixture, coating both sides. Shake off excess, but keep well coated and place on the oiled baking sheet. Bake at 425 about 15-20 minutes, or until crumbs are beginning to brown. Remove from oven and let cool.

Assemblage:

On top of a baked green tomato, place a small dollop of goat cheese, then a slice of red tomato. Lightly sprinkle with coarse sea salt. Place another very small dollop of goat cheese* and then place 1/2 kalamata olive on top. Continue with the rest of the tomatoes, then when assembled on your serving tray, sprinkle dried basil and parsley over the whole tray. May be made ahead, refrigerated and brought out to room temp before serving.

*You may notice in the picture, that the olive is secured by a green dollop. Here at the beach, I made an Avocado/Spinach/Artichoke heart dip the night before, and used it to secure the olive. That recipe is not included as I really have to make it again before I can even remember everything that went into the bowl!


Ruckus - asst. mgr. at Cromwells

Saturday, July 11, 2015

It's Big Crafty Time!

I don't get out to do shows much anymore. I love getting to chat leisurely with folks about my work and watch them find pieces they love - not something I get to do when I'm not in the gallery. It's fun, but it's exhausting, and happily my own gallery keeps me busy filling inventory, plus I have an eclectic mix of clients that grace me with many opportunities to design and make new work. 


That being said, The Big Crafty is a really, really fun show. Plus, it's here in my town, and a lot of other artist friends who I don't get to see much are likely to be in the show or attending the show, so it's a win all around. I get to see friends, plus spend the day chatting with folks about my work. 


Conversation Plate by Holly de Saillan
This year will be a bit different in two ways: my usual cohort and table partner, Holly deSaillan (clay & mosaics by Holly de Saillan), will be at The Big Crafty, but she's filling her own entire space this year, and I can't WAIT to see her new work! I'm still happy filling half a space, so I was thrilled when Angelique Tassistro (Fly Coop Studios) agreed to apply with me and share the space. And even better, we're right next to Holly!


Olive Dishes by Angelique Tassitro 
The other difference this year is that I'm taking the opportunity to try some new designs out on my work that I bring to the show. To keep myself from going too crazy, I limited myself to drinking vessels - in fact that's all I'll have at this show: mugs, tea bowls, tumblers and cups. I'll have a few of my current designs, but I'll also have a larger grouping of sgraffito and relief-carved pieces in new designs. Some will enjoy their fun at The Big Crafty and happily retire, but some will find their way into other facets of my work.


New work, new glaze, new firing fun!

I hope you'll come by and check it out - you'll only find it at The Big Crafty, or you'll have to wait and see if/how it shows up again!

The Big Crafty is on Sunday, July 12 from 12-6pm in downtown Asheville at the Asheville Art Museum. Vendors will be outside and inside, and you'll find me and Angelique inside, on the lower level, at space #48.

Friday, June 26, 2015

200 Mug Challenge!!

We're making 200 mugs to celebrate the first firings of the Kazegama Kiln, and if we can get 200 donations at the mug level on our Kickstarter, we'll pretty much be able to build this kiln!

And, 200 mugs will find happy homes - if you'd like to be one of them, please check out our Kickstarter. The firings will be in early Fall, so this is a great way to make some early holiday purchases that will be very special and treasured gifts!

Wednesday, June 10, 2015

Kazegama Kickstarter


We're in our fourth year at The Village Potters, and each year, our galleries, working studios and Teaching Center have continued to grow. Our galleries now include three showrooms, and our working studios hold the full time studios of six Resident potters and two studio assistants. Our student body is up to about 35, with many of the students are looking for ways to continue to study with us as they expand their skills and even prepare for a professional career themselves. 


To that end, we're growing to meet the needs of more visitors, new accounts and new students. We'll be expanding into another 2000 sq ft at the end of the year, and we're in the process of launching a new Independent Study & Mentoring Program. This invitational program will allow 1-2 year study for students wishing to sharpen their skills for their own pleasure or to develop a portfolio for professional use. Regular mini-workshops, mentorship, critiques and even exhibit opportunities will be available for participants. If you happen to be an interested artist, you can get more information by emailing 'info' at 'thevillagepotters.com' and asking for an Application to the IS/M Program.

And that's not all! We're also expanding our fire power by making plans to build a 'wood-influenced' Kazegama Kiln. This small kiln will allow us to fire in reduction with gas, and then add wood ash and even soda ash into the environment to create wood-fire effects while allowing us to fire within city codes. By building the kiln on a trailer, we also have the ability to protect it from any rising tides, as we're in the flood plain, and we will also be able to travel with the kiln to conduct workshops at other locations. 


The Kazegama Kiln

Because we have been so fortunate to have so much support from our community of friends, family and collectors, we are asking for help in building this segment of The Village Potters. We have established a Kickstarter Campaign for the Kazegama kiln, and with your support, we will be able to have our first community firings by the end of the summer, and have it fully functioning for the first class of participants in the Independent Study and Mentorship Program! 

And your donation will garner you any number of lovely rewards from each of The Village Potters. Some are available in the classic glazes you already know and love, and some are planned for the new kiln. And each and every donation comes with our deep and sincere appreciation. "It Takes a Village" is a fond refrain often heard around the studio, and we've done so much with our Village, we thank you for what has been and we thank you for what is to come!


Check out our Kickstarter Campaign, and Thank You!

Sunday, April 19, 2015

Quickie Frittata

A quickie post for a quickie breakfast promised for a friend who keeps asking for some sort of recipe.

Eggs are such a great vehicle for all sorts of meals, and with relatively small amounts of extra ingredients, can serve 1-10 a very satisfying meal.

Today's quickie with what was on hand. As always, feel free to use this as a template and mix and match your own favorite 'on hand' ingredients:


Quickie Frittata (serves one hungry, two with toast/fruit, etc.)

Preheat oven to 350 degrees.

2 slices uncooked bacon, chopped
1 clove garlic, finely chopped
About an inch size piece of onion, finely chopped
1 small carrot, finely diced
3 leaves of kale, stem removed and finely sliced
3 broccoli crowns, chopped up
Small chunk of Pecorino Romano, finely chopped
2 duck eggs (= xl eggs)
More Romano for grating
Salt/Pepper
Fresh or dried thyme leaves - to taste.

Heat a small cast iron pan over medium-high heat. Add the chopped bacon and let cook until just about as crisp as you would normally cook bacon.

Add onions, garlic and carrot and cook to soften. Salt and pepper lightly. When veg is softened (about 2 minutes), add the broccoli and kale and continue to cook, stirring occasionally, to soften green veg.

Beat the eggs in a bowl, add chopped pecorino, dried thyme if using dried, salt and pepper to taste and just a bit of water. Evenly distribute veg in pan, and pour eggs over as evenly as possible. If using fresh thyme, sprinkle on top and quickly grate a bit more Pecorino on top. 

The time it takes to do that will get the bottom nicely cooked. Place the pan in the pre-heated oven and let it cook until the eggs puff up slightly, 3-5 minutes depending on how soft or firm you like your eggs. 

If you're not so hungry by the time it's done that you eat the whole thing, leftovers are quite nice as a snack straight from the fridge, later.

Saturday, February 21, 2015

MacGyver Lunch

Due to a combination of the busy-ness of getting back to work after the holidays, weather delays, and various rounds of 'the crud', we haven't really done much cooking in studio yet this year. So when a spontaneous desire for a studio lunch was being hatched yesterday, I knew we'd need most of what we wanted to eat. My lovely studio mates equipped me with a requested menu, a list and a credit card, and left the rest up to me - which is one of my favorite ways to shop! I didn't want to have to go to several shops, so I was determined to get everything from the closest grocery. The requested menu: burgers, sweet potato fries, and pie. To make the adventure more interesting, the closest grocery is Hopey & Co., which is "an artisan and discount food and beverage shop", which means you can always find really cool ingredients, but not necessarily all the time.

Organic beef - check. Whole wheat buns, avocado, sweet onion, bacon, and cheese - check. Sweet potatoes and requested beverages - check. Pie ... almost anytime I'm NOT looking for pie, there is pie in the freezer section. Today, no pie. But they did have whole wheat pie shells and bags of sliced, frozen peaches. Pie! Grabbed those, along with some candied ginger and back to the studio.

Maybe in another post, I'll go into detail about not having any oils at the studio, and how I used a combination of margarine, oil from a tub of olives, and bacon grease for the lunch prep. As it was, we were all so hungry, I didn't get any pictures of that, so we'll go on to the pie.

While things were in the oven, I started to put together the pie so I could let it bake while we ate lunch. I sliced up the ginger pieces, tossed them with the peaches and a little sugar, and then (and only then) did I realize I might need something to soak up the excess juices bound to come out of the peaches. No cornstarch. No arrowroot. No agar. What's this in the freezer - ground flax seed? I'd used that as an egg substitute and to thicken up soups before, so a little should help, plus it's good for us. What's this in the back of the cupboard - instant oatmeal? Perfect! Tossed that in as well, mounded the fruit in the shell, and inverted the extra shell on top. A little egg wash and a sprinkle of sugar, and a whole lotta 'please oh please don't be a runny mess when you come out!"


Because I had to dash off to a meeting and because I couldn't stand to wait, we cut the pie while it was still pretty warm, so there were juices, but I could tell that given a proper cooling-off time, the pie would have held up fine:


And to my great delight and astonishment, when I came in to open the Gallery this morning, I found leftover pie!! Breakfast of champions, and a nice little slice confirmed that the pie was in fact a pie. And it was good. 


And is it odd that I rather enjoy this sort of renegade kitchen fare? Not every time, but once in a while, it's rather invigorating!

Sunday, February 1, 2015

Super Breakfast for Super Bowl Sunday

Irish Bangers, Creamy Polenta, Kale and Eggs

Plate by Matt Clark, Mug by me

Also just a good hearty breakfast or brunch for the winter. House-made Irish Bangers from my local market, a new batch of eggs from one of my favorite local farmers and an interesting recipe from the NY Times motivated this, as well as a busy day ahead at the studio before heading to a friend's Super Bowl party. Just one recipe below, sharing that from the NY Times as the sausage was simply cooked in a cast iron pan, the kale was lightly braised in some leftover veggie broth, and the egg done over easy. The entire recipe, from Mark Bittman, includes the sausage, and I tweaked the polenta recipe to my tastes, but here is the original recipe for the polenta:

Creamy Polenta


1 cup medium-coarse cornmeal
Salt
1 cup, plus 3-4 cups water
Salt
2 TBSP butter
1/2 - 1 cup grated parmesan
Freshly ground black pepper

Put the cornmeal in a medium saucepan, along with 1 cup water and whisk well to make a slurry; continue whisking mixture to eliminate any lumps. Put pan over medium-high heat, sprinkle with salt and bring to a boil. 

Reduce heat to medium and continue to cook, whisking frequently and adding water as needed to keep mixture loose and free of lumps, between 3-4 more cups. If mixture becomes to thick, simply add a bit more water; consistency should be similar to sour cream.

Polenta will be done in 15-30 minutes, depending on the grind of the corn meal. Add cheese and butter. Taste and add salt, if necessary and lots of pepper.


Wednesday, January 14, 2015

Not Your Great-Grandma's Fruitcake!

I know I said I'd share some recipes from my Virginia Beach adventure last year, and I will, but I have to jump into the present because this is just so good!

This is courtesy of my studio mate Sarah Wells Rolland, who made these lovely little fruitcakes for holiday gifts. I just got mine and had a sliver with my mid-morning coffee, and I know I'm going to savor every single bite! And since I'm not willing to share the actual treat, I thought it'd be nice to share the recipe.

Sarah said she learned about this recipe from our other studio mate Karen Dubois, and I'm sure she heard about it from somewhere too. Good recipes have a way of getting around, and like all recipes I love, this one is completely open to interpretation, so you can use the fruits and nuts you like best - a bunch or just a few. Enjoy!


Dried Fruit and Nut Loaf

3/4 cup all-purpose flour
1/4 teaspoon baking soda
1/4 teaspoon baking powder
1/2 teaspoon salt
3/4 cup firmly packed light brown sugar
3 cups coarsely chopped walnuts (can also use pecans, hazelnuts, or almonds)
1/2 cup dried cherries and/or cranberries
½ cup dried blueberries
2 cups dates and figs, pits removed and cut into quarters
1/2 cup dried apricots cut into quarters
3 large eggs
1 teaspoon pure vanilla extract
Brandy

Preheat oven to 300 degrees F and place the rack in the center of the oven. 

Butter, or spray with a vegetable oil spray, a 9 x 5 inch (23 x 12 cm) (8 cup) loaf pan, and line the bottom of the pan with parchment paper.

In a large bowl, whisk together the flour, baking soda, baking powder and salt. Stir in the brown sugar, walnuts, and dried fruits. Use your fingers to make sure that all the fruits and nuts have been coated with the flour mixture.

In a separate bowl, beat (with a wire whisk or an electric hand mixer) the eggs and vanilla until light colored and thick (this will take several minutes). Add the egg mixture to the fruit and nut mixture and mix until all the fruit and nut pieces are coated with the batter. Spread into the prepared pan, pressing to even it out.

Bake for about 60 to 75 minutes, or until the batter is golden brown and has pulled away from the sides of the pan. (If you find the loaf over browning, cover with aluminum foil.) Remove from oven and place on a wire rack to cool. 

When cool, lift the loaf from the pan. Wrap in a single layer of cheesecloth and place in a plastic bag (if making small loaves, wrap individually and bag separately or two per bag). Using a turkey baster, suck up some of the brandy and moisten both top and bottom of wrapped loaves while in the plastic. Seal well and re-moisten again over the next 2-3 days (1/4 cup should cover all mini loaves or one larger loaf, 2nd and 3rd moistening will take less).

This loaf is best after being stored for a couple of days. Will keep for about 2 weeks at room temperature or for a couple of months in the refrigerator. Cut into small slices with a sharp knife.

Makes one - 9 x 5 inch (20 x 13 cm) loaf.
For small loaves cook for 55 minutes


Monday, January 12, 2015

Hello January!

Well this little blog may yet be the best example of just what a whirlwind the end of 2014 was for me. I popped in to share a new lovely blog I just discovered (Pepper and Salt - linked on the blog roll on the right), but maybe a brief re-cap of the past several months, and then we'll move ahead into the new year!

It seems I left the blog just as I left for a most wonderful, three-week adventure of cooking by the ocean. I was at Sandbridge Beach, VA, feeding three consecutive 'camps' of people studying hammered dulcimer. In short, my good friend Laurie M., herself a mighty fine hammered dulcimer player and attendee at the camp, asked me if I was interested when the chef who had been doing the job had to decline because of a schedule conflict. Stepping away from the studio for three weeks, not to mention three weeks during busy season, is not a light decision. The logical answer would have been 'of course not, but thank you', but three weeks cooking at the beach sounded like too much of a good thing to pass up, and it was the absolute best working vacation. Ever. Besides, it was a lot of fun telling people I was off to cook for the hammered dulcimer camp. You know, as one does... If it weren't for my extremely fabulous studio and Collective-mates, it never would have happened. They are the BEST.

So three weeks of this:


my morning routine: coffee and a nice walk on the beach at sunrise
It never got old, this...


And of this:


Sunday night is Crab Night!
Baked fish and Grilled chips
I really thought I'd have plenty of time to document and record here all my stellar recipes and local finds, but I was kept busy enough that I was happy to make some scribbles in my notebook at the end of the night before crashing. And yes, that was one of the reasons it was so much fun! I'll put some recipes up under separate posts (this is already long enough!).

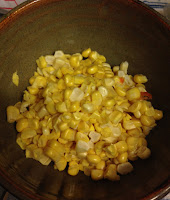
You will find a recipe for this Gluten Free Strawberry Corn Cake on my Crazy Green Studios website food blog:


Looks and tastes like summer!

My days: a meditation at the beach with a cup of coffee at sunrise, followed by a nice walk down the beach. 


Only three days of rain in three weeks. Sigh.
Back to the house for breakfast and to share the menu plan with the 'campers', then check the fridge and cupboard stock and head off for groceries. This could take anywhere from 1-3 hours, depending on where I went and how much shopping was happening. The upside to having just one regular fridge for my 'stock' and one for the campers to keep breakfast, lunch and snacks on hand was that I had to shop every day. I love shopping fresh every day! The closest grocery store was about 6 miles, but of course one shops and compares, and some days I hit the Farmers Market or drove out to the Whole Foods or hit the other local grocers. Happily, the 'good' fish place was the closest as well as the best, so I was a regular face at Bonney & Sons, and they always had just what I needed! Even more happy, I found a wonderful farm stand on the way into town, and that also became a daily stop. Cromwells Produce had veggies so fresh, one time I asked the young proprietress if there was more kale, and she went outside and cut more for me! All that, and a very cute mascot:


Ruckus - happy greeter at Cromwells Produce.
After shopping, it was back to the house, where on lucky days I'd find campers or spouses on hand to help me bring the 8-12 bags of groceries upstairs to the kitchen. By then lunch would be just starting or finishing, so after lunch (and another assessment of the fridge and cupboard), I'd start prep for the happy hour snacks and dinner. I'd often have help from some of the camper spouses/family, which always made it more fun and a lot easier (cooking for about 28 each night), and I think we all made a stellar team of choppers, washers, grillers and general helpers!


some of my volunteer helper army
Happy Hour would include an array of nibbles before dinner, and I was able to share some local (to me) love with the campers thanks to the very generous Roots Hummus, who made sure that no camper went hungry for hummus!


new hummus fans across the country and around the world!
After dinner, I enjoyed a tremendous perk of having the campers clean up the kitchen while I watched (just to make sure I knew where things were going). By then, it's a 12 hour day or so, and a few quick notes in the book are about all I had steam for, but what a blast!!

After three weeks, it was a very fond farewell and back to the life of a potter who just loves to cook. I had a lot of curious questions from folks wondering if I was changing careers again. Not at all - I am a very happy full time potter, and a lucky one who gets to spend a lovely three week vacation cooking for a very receptive crowd at the beach. I'm already looking forward to joining my camper friends again later this fall!


the reward: happy diners tucking into a delicious meal!